Showing posts with label Sewing. Show all posts

September 9, 2015

Nursing Scarf Tutorial


This scarf is super easy and fast to make and looks oh so cute! I wish I would have had one of these with my first baby, but glad I have one ready for my second baby on the way! This scarf only requires a yard of fabric to make, so go ahead and make a variety of different colors to go with an outfit!  These scarves would make a great accessory to wear even if you’re not a nursing mamma.


I love how the one for my sister turned out. She has a sweet baby boy who was born in June!

Nursing Scarf Tutorial 

Supplies: 1 yard of jersey fabric * (Both Fabrics shown are from fabric.com, I purchased both shown last spring and saw neither are in stock.)
                Matching thread
                Sewing supplies
*I would recommend choosing a jersey fabric that’s light weight and not very thick, so the scarf is not too bulky when worn around the neck.


Start by cutting a piece of jersey fabric 60" x 36" 
(Most jersey fabric is sold at 60" wide, so if you buy a yard you won't even have to cut anything. Make sure before buying though, since you want it at least 60" long)

Fold in half so that the right sides of the fabric are facing each other and sew a straight seam along the raw edge.

No need to worry about the raw edge of the seam, it will curl over (like shown above) and make a perfectly neat inside seam. Which means you're done!
 

Wrap it around twice for a nice looking infinity scarf.


 As a nursing cover you can pull the excess to the back and wear it diagonally across your chest so you're covered, but also free to move. 

That has to be the shortest instructions I’ve written! Super easy right! If you have any questions or comments leave them below.

Janelleno.5


April 20, 2015

Gathered Maxi Skirt Tutorial


    Supplies:
 1 1/2 Yards Knit Fabric (Fabric.com is were mines from)
2 inch wide elastic - your waist measurement + 1 inch
Matching Thread
Sewing Supplies


1.     Measure and cut your skirt Start by measuring just below where you would like the skirt to hit on your waist down to the floor.

Now lay out your fabric lengthwise and measure down how long your length measurement was. Using a pencil, mark a straight line across with a ruler to make a large rectangle.

Next I cut the piece of fabric down the middle on the fold, to make front and back skirt pieces.


2.      Make your fabric waist band. Measure around your waist, use this measurement to cut one long rectangle. The band will be your waist measurement by 5-6 inched wide.
     Fold your waistband to make a circle. with right sides facing each other sew a ½ seam allowance down the side of the waistband.

3.      Elastic waistband. 

Cut a piece of 2 inch elastic about 1 inch longer than the width of your waist. Overlap the ends of the elastic about 1 inch, creating a loop. With a wide zigzag stitch, sew the overlapping ends together. 


4.       Sew your skirt. With right sides together pin and sew up the sides of your skirt.


5.      Make the gathered waist. With the longest stitch on your machine sew all the way around the top of your skirt, then pull the bottom threads and make an even gather around your whole skirt about the same size as your waist measurement.


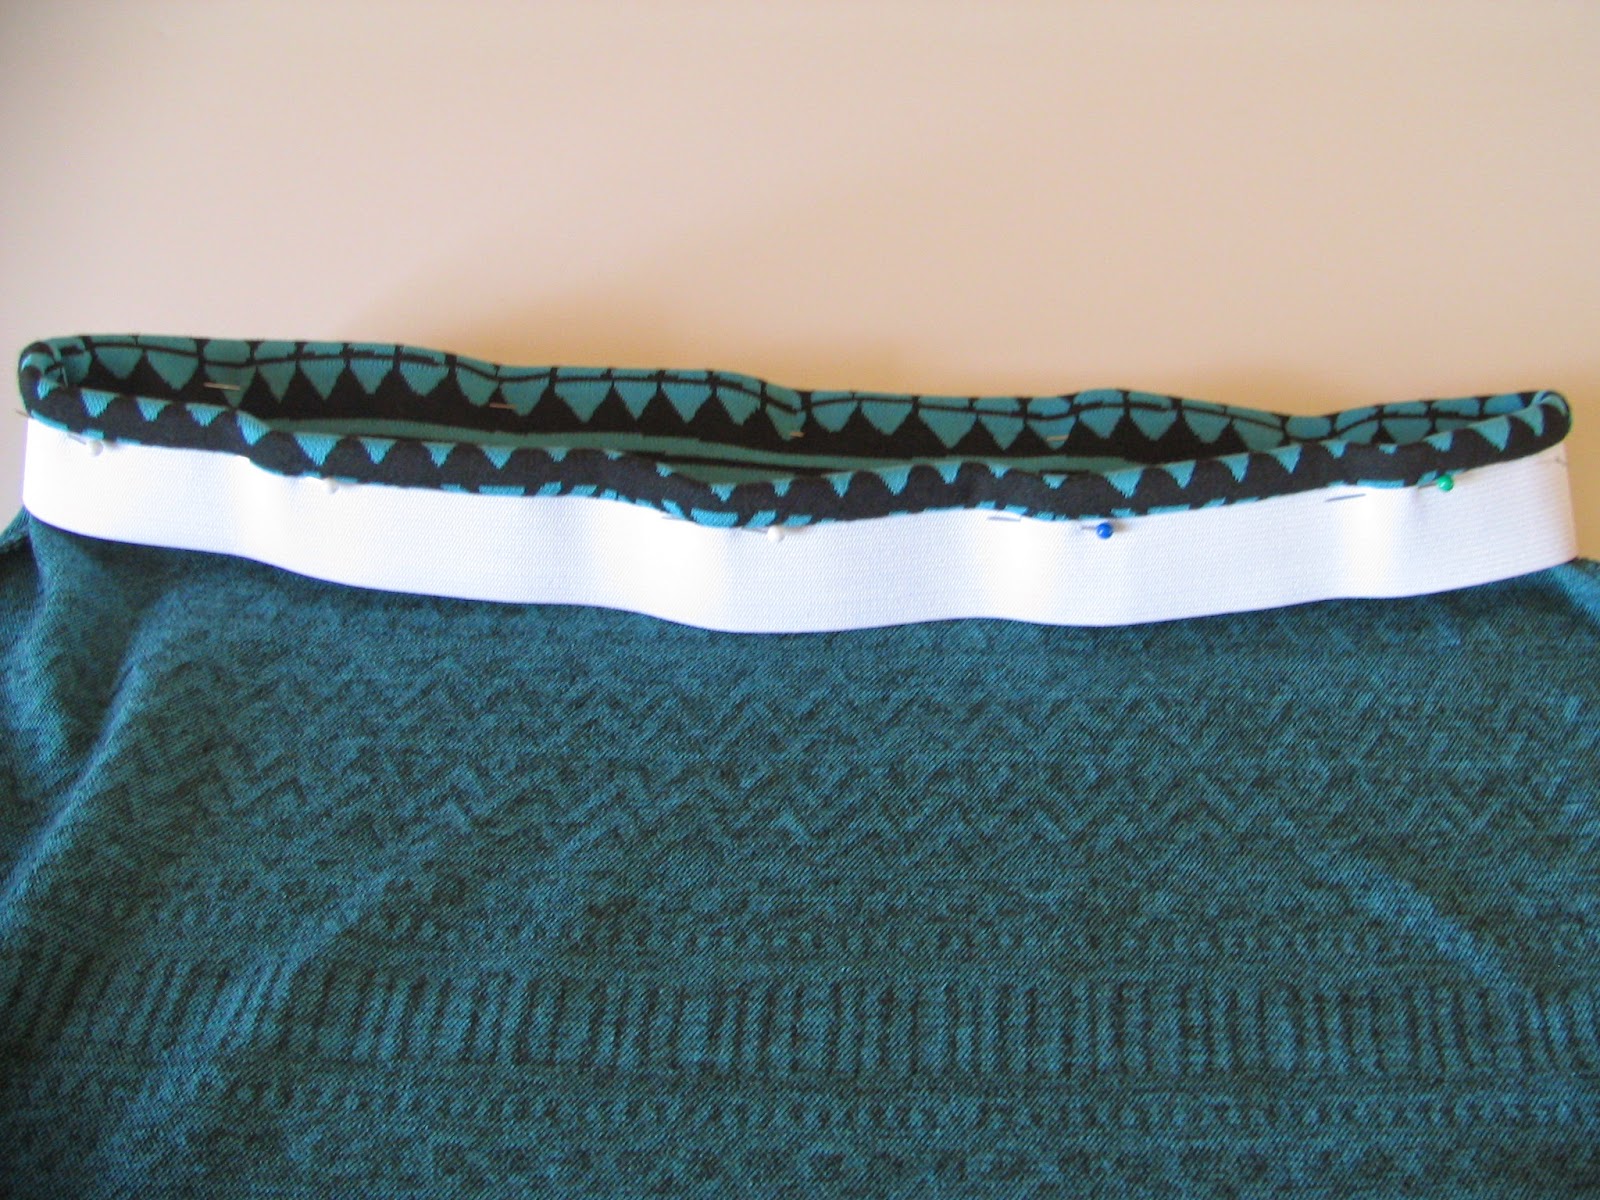
6.      Assemble your waistband. Take your fabric waistband and fold in half so that wrong sides of the fabric are touching, now put your elastic inside and pin the waistband together. This will make pinning the waistband to the skirt easier in the next step.


7.      Pin and sew your waistband to your skirt. With your skirt right side out pin the waistband around the top of the skirt sew a straight line around and then a zigzag stitch around.


8.      Hem the skirt. 

Try the skirt on and make sure it is the length you want.

Fold the bottom edge under 1/2 inch and then again another 1/2 inch, then top stitch in place.

And there you have it!

April 10, 2015

Jersey Pencil Skirt Tutorial


I am so excited to share my first ever blog post on how to sew this fast and easy skirt!

First I would like to recognize and give a special thanks to my dearest friend Elizabeth for helping me get this blog set up and looking pretty! Check her crafty blog out here (ElizabethAve) for lots of sewing tutorials and crafts!

I would also like to recognize and thank my dad for taking the photos used for this blog post and surprisingly no ankles were broken while jumping off rocks during this photo shoot.

Materials:

Mid to Heavy weight knit fabric – 3/4 yard (mine's from Jo-Ann Fabric)

2 inch wide elastic – your waist measurement + 1 inch

matching thread

basic sewing supplies/machine

nice fitting stretch pencil skirt (to use as pattern)

pattern paper (I used wrapping paper with the grid lines on the back)


Fabric: The fabric I used was a heavy knit stretch fabric and was easy to work with, I wouldn't recommend light weight knits or knits with a lot of drape for this type of skirt. 


1. Making your pencil skirt pattern

First I laid a nice fitting pencil skirt folded lengthwise on my grid lined wrapping paper.  Put the middle of the skirt aligned with the edge of your paper and then trace around the skirt with a pencil. 


Because the knit stretches more than the skirt I was using, you need to remove some width from the pattern you’ve made. If you choose not to do this, you will end up with a looser fitting skirt.


Now to decide how much to remove…

If you remove 1/2 inch from the outer curve of the pattern piece, you will end up with a slim pencil skirt that is still a bit loose fitting. If you want a skirt that fits slimmer, like the one I am wearing in the pictures in this post, you will need to remove about 1 inch from the outer curve.

To achieve a more dramatic pencil skirt shape, I also eased the curve in even more from the hip to the legs (pictured below).


2. Cutting out your skirt from your skirt pattern

Now that your pattern piece is ready. Cut two identical skirt pieces on the fold.


3. Sew the skirt pieces together 
With right sides facing, sew the two skirt pieces together at the sides with a 1/2 inch seam allowance. Next use a zigzag stitch along the raw edge, for a finished edge.


4. Sew elastic waistband

Cut a piece of 2 inch elastic about 1 inch longer than the width of the waist of the sewn skirt.

Over lap the ends of the elastic about 1 inch, creating a loop. With a wide zigzag stitch, sew the overlapping ends together. 


Matching up and pin the elastic waistband to the skirt. Make sure the skirt is right sides out and the elastic band is pinned around the outside of the waist. 


Sew the elastic waistband to the skirt with a 1/2 inch seam allowance.

Now that the waistband is sewn to the skirt, flip it up. Then, flip it down again into the inside of the skirt.

Stitch in the seam (also called stitching in the ditch) to secure the waistband and to keep it from flipping up.


5. Hem the skirt. 

Try the skirt on and make sure it is the length you want.

fold the bottom edge under 1/2 inch and then again another 1/2 inch, then top stitch in place.

I hope you enjoyed this first blog post and thanks for reading, if you have any questions or comments please feel free to write them below!